Uploading Your Python Application to Heroku and Use Bash
Getting Started on Heroku with Python
Last updated March 16, 2022
Table of Contents
- Introduction
- Fix upwards
- Prepare the app
- Deploy the app
- View logs
- Define a Procfile
- Calibration the app
- Install app dependencies locally
- Run the app locally
- Push local changes
- Provision add together-ons
- Get-go a console
- Define config vars
- Provision a database
- Next steps
Introduction
This tutorial will have y'all deploying a Python app (a simple Django app) in minutes.
Hang on for a few more minutes to learn how it all works, and so yous can make the about out of Heroku.
The tutorial assumes that you take:
- a costless Heroku account.
- Python version 3.10 installed locally - see the installation guides for Bone 10, Windows, and Linux.
- Postgres installed locally, if running the app locally.
Prepare
The Heroku CLI requires Git, the pop version control system. If you don't already have Git installed, complete the following before proceeding:
- Git installation
- First-time Git setup
In this pace you'll install the Heroku Control Line Interface (CLI). Yous apply the CLI to manage and scale your applications, provision add-ons, view your application logs, and run your application locally.
Download and run the installer for your platform:
In one case installed, you can use the heroku command from your command shell.
On Windows, starting time the Control Prompt (cmd.exe) or Powershell to access the control beat.
Use the heroku login command to log in to the Heroku CLI:
$ heroku login heroku: Printing whatever key to open up the browser to login or q to exit › Alert: If browser does non open, visit › https://cli-auth.heroku.com/auth/browser/*** heroku: Waiting for login... Logging in... washed Logged in as me@case.com This command opens your spider web browser to the Heroku login folio. If your browser is already logged in to Heroku, merely click the Log in button displayed on the page.
This authentication is required for both the heroku and git commands to work correctly.
Set up the app
In this step, you will prepare a elementary application that tin be deployed.
Before continuing, make sure Git is installed (see Ready).
To clone the sample awarding so that you have a local version of the code that yous tin can then deploy to Heroku, execute the following commands in your local command shell or terminal:
$ git clone https://github.com/heroku/python-getting-started.git $ cd python-getting-started You now have a operation git repository that contains a simple application, a runtime.txt specifying which Python version volition be used, and a requirements.txt, which is used by Python's dependency manager, Pip.
Deploy the app
In this step you lot volition deploy the app to Heroku.
Before continuing, brand sure both Git and the Heroku CLI are installed (see Prepare up).
Create an app on Heroku, which prepares Heroku to receive your source lawmaking:
$ heroku create Creating app... done, ⬢ serene-caverns-82714 https://serene-caverns-82714.herokuapp.com/ | https://git.heroku.com/serene-caverns-82714.git When you create an app, a git remote (called heroku) is also created and associated with your local git repository.
Heroku generates a random name (in this case serene-caverns-82714) for your app, or you can pass a parameter to specify your own app proper noun.
Now deploy your code:
$ git button heroku main Enumerating objects: 509, done. Counting objects: 100% (509/509), done. Delta compression using upward to 12 threads Compressing objects: 100% (238/238), done. Writing objects: 100% (509/509), 94.eighty KiB | 94.fourscore MiB/south, done. Full 509 (delta 234), reused 509 (delta 234), pack-reused 0 remote: Compressing source files... done. remote: Building source: remote: remote: -----> Edifice on the Heroku-twenty stack remote: -----> Determining which buildpack to utilize for this app remote: -----> Python app detected remote: -----> Using Python version specified in runtime.txt remote: -----> Installing python-three.x.3 remote: -----> Installing pip 21.3.ane, setuptools 57.v.0 and wheel 0.37.0 remote: -----> Installing SQLite3 remote: -----> Installing requirements with pip remote: Collecting django remote: Downloading Django-4.0.1-py3-none-any.whl (viii.0 MB) remote: Collecting gunicorn remote: Downloading gunicorn-20.ane.0-py3-none-any.whl (79 kB) remote: Collecting django-heroku remote: Downloading django_heroku-0.3.i-py2.py3-none-whatsoever.whl (half-dozen.2 kB) remote: Collecting asgiref<four,>=3.4.i remote: Downloading asgiref-3.4.1-py3-none-any.whl (25 kB) remote: Collecting sqlparse>=0.2.two remote: Downloading sqlparse-0.iv.two-py3-none-any.whl (42 kB) remote: Collecting psycopg2 remote: Downloading psycopg2-2.9.3.tar.gz (380 kB) remote: Preparing metadata (setup.py): started remote: Preparing metadata (setup.py): finished with status 'done' remote: Collecting dj-database-url>=0.five.0 remote: Downloading dj_database_url-0.5.0-py2.py3-none-any.whl (5.5 kB) remote: Collecting whitenoise remote: Downloading whitenoise-v.3.0-py2.py3-none-any.whl (19 kB) remote: Building wheels for collected packages: psycopg2 remote: Edifice wheel for psycopg2 (setup.py): started remote: Edifice wheel for psycopg2 (setup.py): finished with status 'done' remote: Created wheel for psycopg2: filename=psycopg2-2.9.three-cp310-cp310-linux_x86_64.whl size=586593 sha256=25ea6b40570d00fb7329c9691e557245a1050857323893e93068f0f07ecef238 remote: Stored in directory: /tmp/pip-ephem-cycle-cache-d5wzowyy/wheels/81/b6/3d/091aad3e8919ea76c84c2674b02ce3ab52de882e091c39249e remote: Successfully built psycopg2 remote: Installing nerveless packages: sqlparse, asgiref, whitenoise, psycopg2, django, dj-database-url, gunicorn, django-heroku remote: Successfully installed asgiref-3.4.ane dj-database-url-0.5.0 django-iv.0.i django-heroku-0.3.1 gunicorn-20.1.0 psycopg2-2.9.3 sqlparse-0.four.ii whitenoise-5.three.0 remote: -----> $ python manage.py collectstatic --noinput remote: 129 static files copied to '/tmp/build_a5ccf75d/staticfiles', 379 postal service-candy. remote: remote: -----> Discovering procedure types remote: Procfile declares types -> spider web remote: remote: -----> Compressing... remote: Done: 68.1M remote: -----> Launching... remote: Released v5 remote: https://serene-caverns-82714.herokuapp.com/ deployed to Heroku remote: remote: Verifying deploy... done. To https://git.heroku.com/serene-caverns-82714.git * [new branch] revert-to-requirements -> main The application is now deployed. Ensure that at least one case of the app is running:
$ heroku ps:scale web=1 If when running the ps:scale command above you lot meet the error "Couldn't find that process type (web)", it ways the first deploy of the application is taking a bit longer than normal, and the command should be repeated afterwards waiting a few minutes.
Now visit the app at the URL generated by its app name. As a handy shortcut, you lot can open the website as follows:
$ heroku open View logs
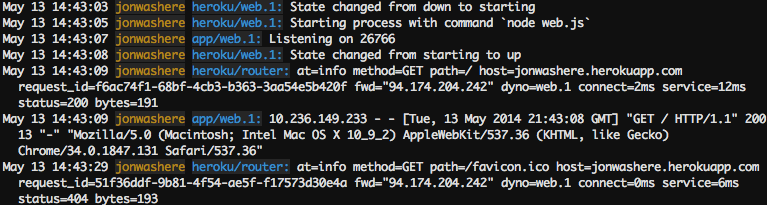
Heroku treats logs every bit streams of time-ordered events aggregated from the output streams of all your app and Heroku components, providing a single channel for all of the events.
View information nearly your running app using one of the logging commands, heroku logs --tail:
$ heroku logs --tail 2022-01-19T16:49:40.323576+00:00 heroku[web.1]: Starting process with command `gunicorn gettingstarted.wsgi` 2022-01-19T16:49:41.952853+00:00 app[web.i]: [2022-01-19 sixteen:49:41 +0000] [4] [INFO] Starting gunicorn 20.ane.0 2022-01-19T16:49:41.953307+00:00 app[web.1]: [2022-01-19 16:49:41 +0000] [4] [INFO] Listening at: http://0.0.0.0:5021 (iv) 2022-01-19T16:49:41.954552+00:00 app[web.ane]: [2022-01-19 16:49:41 +0000] [four] [INFO] Using worker: sync 2022-01-19T16:49:41.962918+00:00 app[web.1]: [2022-01-nineteen 16:49:41 +0000] [ix] [INFO] Booting worker with pid: nine 2022-01-19T16:49:41.992997+00:00 app[web.i]: [2022-01-19 16:49:41 +0000] [10] [INFO] Booting worker with pid: x 2022-01-19T16:49:42.380291+00:00 heroku[web.1]: Country changed from starting to up 2022-01-19T16:49:44.000000+00:00 app[api]: Build succeeded 2022-01-19T16:56:43.488176+00:00 heroku[router]: at=info method=GET path="/" host=serene-caverns-82714.herokuapp.com request_id=df14c065-0d94-45b7-b21e-6e69a0ad93e2 fwd="123.45.67.89" dyno=web.1 connect=0ms service=31ms condition=200 bytes=7719 protocol=https Visit your application in the browser again, and y'all'll see another log message generated.
Press Control+C to finish streaming the logs.
Define a Procfile
Utilise a Procfile, a text file in the root directory of your application, to explicitly declare what command should be executed to starting time your app.
The Procfile in the instance app you deployed looks like this:
web: gunicorn gettingstarted.wsgi This declares a single process blazon, web, and the control needed to run it. The proper noun spider web is important here. It declares that this procedure type will be fastened to the HTTP routing stack of Heroku, and receive web traffic when deployed.
Procfiles can contain additional process types. For example, yous might declare one for a groundwork worker process that processes items off of a queue.
Microsoft Windows
The sample app has an additional Procfile for local development on Microsoft Windows, located in the file Procfile.windows. Later tutorial steps volition utilize this instead: it starts a unlike web server, one that is uniform with Windows.
spider web: python manage.py runserver 0.0.0.0:5000 Scale the app
Right now, your app is running on a single web dyno. Remember of a dyno equally a lightweight container that runs the command specified in the Procfile.
You can check how many dynos are running using the ps command:
$ heroku ps Gratuitous dyno hours quota remaining this month: 999h 50m (99%) Free dyno usage for this app: 0h 0m (0%) For more information on dyno sleeping and how to upgrade, run across: https://devcenter.heroku.com/articles/dyno-sleeping === spider web (Free): gunicorn gettingstarted.wsgi (1) web.ane: up 2022/01/xix 16:49:42 +0000 (~ 3m ago) By default, your app is deployed on a gratis dyno. Gratuitous dynos volition sleep after a half hour of inactivity (if they don't receive any traffic). This causes a delay of a few seconds for the first request upon waking. Subsequent requests will perform normally. Costless dynos also consume from a monthly, account-level quota of gratis dyno hours - as long as the quota is not wearied, all costless apps can continue to run.
To avert dyno sleeping, you lot can upgrade to a hobby or professional dyno blazon as described in the Dyno Types article. For case, if y'all migrate your app to a professional dyno, you can easily scale it past running a command telling Heroku to execute a specific number of dynos, each running your web process type.
Scaling an application on Heroku is equivalent to changing the number of dynos that are running. Calibration the number of web dynos to zero:
$ heroku ps:scale web=0 Scaling dynos... done, at present running web at 0:Free Access the app again by hitting refresh on the web tab, or heroku open up to open up information technology in a web tab. You will get an error message because y'all no longer have whatever spider web dynos bachelor to serve requests.
Scale it upwards again:
$ heroku ps:calibration web=1 Scaling dynos... done, now running web at one:Costless For corruption prevention, scaling a non-free awarding to more than than one dyno requires account verification.
Install app dependencies locally
Heroku recognizes an app as a Python app by looking for key files. Including a requirements.txt in the root directory is one way for Heroku to recognize your Python app.
The demo app yous deployed already has a requirements.txt, and information technology looks something similar this:
django gunicorn django-heroku The requirements.txt file lists the app dependencies together. When an app is deployed, Heroku reads this file and installs the appropriate Python dependencies using the pip install -r command.
To install the dependencies locally, we first want to create a "Virtual Environment" (also known as a "venv") into which we can install the packages without affecting your arrangement Python installation. To exercise this, run the post-obit control:
$ python3 -m venv venv Next, the virtual environment needs to be activated.
If you're on a Microsoft Windows organization, activate the venv using:
.\venv\Scripts\activate Or if you're on a macOS/Linux system, activate the venv using:
source venv/bin/activate For help with setting upwardly a virtual environment, see the Python documentation.
Finally, the dependencies tin now be installed into the newly created environment:
$ pip install -r requirements.txt Annotation: Postgres must be properly installed in gild for this step to piece of work properly. If yous're running Linux, the libpq-dev system package (or equivalent for your distribution) must too be installed.
Installing the dependencies also acquired several other dependencies to be installed. You can encounter them by using pip's feature list:
$ pip listing Package Version --------------- ------- asgiref 3.4.1 dj-database-url 0.5.0 Django iv.0.one django-heroku 0.three.1 gunicorn xx.i.0 pip 21.three.1 psycopg2 2.ix.three setuptools 59.v.0 sqlparse 0.4.2 wheel 0.37.0 whitenoise v.3.0 In one case dependencies are installed, y'all volition be ready to run your app locally.
Run the app locally
Earlier continuing, make sure the app's dependencies accept been installed locally.
The app is almost ready to start locally. Django uses local assets, and then commencement, you'll need to run collectstatic:
$ python manage.py collectstatic Answer with "yeah".
Now start your awarding locally using heroku local, which was installed as part of the Heroku CLI.
If you lot're on a Microsoft Windows system, run this:
$ heroku local -f Procfile.windows Or if you're on a macOS/Linux arrangement, utilise the default Procfile by running:
$ heroku local Your local web server will then kickoff up:
[OKAY] Loaded ENV .env File as Fundamental=VALUE Format 17:39:12 web.1 | [2022-01-19 17:39:12 +0000] [18471] [INFO] Starting gunicorn 20.one.0 17:39:12 web.ane | [2022-01-19 17:39:12 +0000] [18471] [INFO] Listening at: http://0.0.0.0:5000 (18471) 17:39:12 web.1 | [2022-01-19 17:39:12 +0000] [18471] [INFO] Using worker: sync 17:39:12 spider web.1 | [2022-01-19 17:39:12 +0000] [18472] [INFO] Booting worker with pid: 18472 Merely like Heroku, heroku local examines the Procfile to determine what to run.
Open up http://localhost:5000 with your web browser. You lot should see your app running locally.
If you see "Not Found" errors in your console, check that the collectstatic step in a higher place was run earlier starting the web server.
To stop the app from running locally, go back to your terminal window and press Ctrl+C to exit.
Push local changes
In this footstep y'all'll learn how to propagate a local modify to the application through to Heroku. As an case, you'll modify the awarding to add an additional dependency and the code to use it.
Add together the requests package to your requirements.txt file:
django gunicorn django-heroku requests And then use pip to install the requests parcel via the updated requirements.txt file:
$ pip install -r requirements.txt Modify how-do-you-do/views.py so that it imports the requests module at the start:
import requests Now alter the index method to make use of the module. Try replacing the current alphabetize method with the following code:
def alphabetize(asking): r = requests.become('https://httpbin.org/status/418') print(r.text) return HttpResponse('<pre>' + r.text + '</pre>') Now exam once again locally.
If you're on a Microsoft Windows system, run this:
$ heroku local -f Procfile.windows Or if you're on a macOS/Linux system, utilize the default Procfile by running:
$ heroku local Visit your application at http://localhost:5000. You should now meet the output of fetching http://httpbin.org/condition/418, which is a lovely teapot:
-=[ teapot ]=- _...._ .' _ _ `. | ."` ^ `". _, \_;`"---"`|// | ;/ \_ _/ `"""` If instead you see the error ModuleNotFoundError: No module named 'requests', check that the steps to install the requests parcel above were completed successfully.
Now deploy. About every deploy to Heroku follows this same blueprint. Beginning, add the modified files to the local git repository:
$ git add . Now commit the changes to the repository:
$ git commit -m "Demo" Now deploy, simply as you did previously:
$ git button heroku chief Finally, check that everything is working:
$ heroku open Provision add-ons
Add-ons are 3rd-political party deject services that provide out-of-the-box additional services for your awarding, from persistence through logging to monitoring and more.
By default, Heroku stores 1500 lines of logs from your application. However, it makes the full log stream bachelor equally a service - and several improver providers have written logging services that provide things such as log persistence, search, and e-mail and SMS alerts.
In this step you will provision one of these logging add-ons, Papertrail.
To help with abuse prevention, provisioning an add-on requires account verification. If your account has not been verified, you volition be directed to visit the verification site, to add a credit-card to your account. This credit card will but be charged if you lot apply paid Heroku features - the default Papertrail program is free.
Provision the papertrail logging add-on:
$ heroku addons:create papertrail Creating papertrail on ⬢ serene-caverns-82714... free Welcome to Papertrail. Questions and ideas are welcome (technicalsupport@solarwinds.com). Happy logging! Created papertrail-convex-88929 as PAPERTRAIL_API_TOKEN Use heroku addons:docs papertrail to view documentation The add-on is at present deployed and configured for your application. You tin list add-ons for your app like so:
$ heroku addons To meet this particular add-on in activeness, visit your awarding's Heroku URL a few times. Each visit will generate more than log messages, which should now become routed to the papertrail addition. Visit the papertrail console to run across the log letters:
$ heroku addons:open papertrail Your browser will open a Papertrail spider web panel, showing the latest log events. The interface lets you lot search and prepare upwards alerts:
Commencement a panel
You can run a control, typically scripts and applications that are part of your app, in a i-off dyno using the heroku run command. It can besides be used to launch a REPL process attached to your local terminal for experimenting in your app'south environment:
$ heroku run python manage.py trounce Running python manage.py shell on ⬢ serene-caverns-82714... upwardly, run.9594 (Free) Python 3.10.three (main, Jan 14 2022, 23:41:42) [GCC 9.3.0] on linux Type "assist", "copyright", "credits" or "license" for more than data. (InteractiveConsole) >>> If you receive an error, Error connecting to process, then you may demand to configure your firewall.
The Python shell is running in the context of your app and all its dependencies. From here you tin import some of your awarding files. For instance, you will be be able to run the following:
>>> import requests >>> print(requests.get('https://httpbin.org/status/418').text) -=[ teapot ]=- _...._ .' _ _ `. | ."` ^ `". _, \_;`"---"`|// | ;/ \_ _/ `"""` To exit the Python beat out, run the command exit().
To get a real feel for how dynos work, you can create another one-off dyno and run the bash command, which opens up a crush on that dyno. You lot can then execute commands there. Each dyno has its own ephemeral filespace, populated with your app and its dependencies - once the control completes (in this case, bash), the dyno is removed.
$ heroku run bash Running bash on ⬢ serene-caverns-82714... upwardly, run.3789 (Free) ~ $ ls app.json gettingstarted hello manage.py Procfile Procfile.windows README.md requirements.txt runtime.txt staticfiles ~ $ exit exit Don't forget to type leave to exit the beat out and terminate the dyno.
Define config vars
Heroku lets you lot externalise configuration - storing data such as encryption keys or external resource addresses in config vars.
At runtime, config vars are exposed as environment variables to the application.
Edit hi/views.py. At the beginning, add a line to import the os module:
import bone Now modify the index method so that it repeats an action depending on the value of the TIMES surround variable:
def index(request): times = int(os.environ.get('TIMES', iii)) return HttpResponse('Hello! ' * times) heroku local volition automatically ready up the environment based on the contents of the .env file in your local directory. In the top-level directory of your project there is already a .env file that has the following contents:
TIMES=2 If you run the app with heroku local then visit http://localhost:5000, you lot'll see two "Hello!"'s.
To set up the config var on Heroku, execute the post-obit:
$ heroku config:set TIMES=two View the config vars that are prepare using heroku config:
$ heroku config === serene-caverns-82714 Config Vars DATABASE_URL: postgres://aadoybxpeabguh:<Countersign>@ec2-three-216-113-109.compute-1.amazonaws.com:5432/d8pcm30gp3rago PAPERTRAIL_API_TOKEN: <SECRET_TOKEN> TIMES: 2 Deploy your changed awarding to Heroku to come across this in action.
Provision a database
The add-on marketplace has a large number of data stores, from Redis and MongoDB providers, to Postgres and MySQL. In this step you will larn about the gratuitous Heroku Postgres add-on that was automatically provisioned when your app was deployed.
A database is an add-on, and and then you can find out a little more almost the database provisioned for your app using the addons command in the CLI:
$ heroku addons Add-on Program Price State ────────────────────────────────────────── ───────── ───── ─────── heroku-postgresql (postgresql-cubed-97628) hobby-dev gratis created └─ as DATABASE ... List the config vars for your app volition brandish the URL that your app is using to connect to the database, DATABASE_URL:
$ heroku config === serene-caverns-82714 Config Vars DATABASE_URL: postgres://aadoybxpeabguh:<Password>@ec2-iii-216-113-109.compute-1.amazonaws.com:5432/d8pcm30gp3rago ... Heroku also provides a pg command that shows a lot more than:
$ heroku pg === DATABASE_URL Plan: Hobby-dev Status: Available Connections: 0/twenty PG Version: thirteen.5 Created: 2022-01-nineteen sixteen:49 UTC Data Size: seven.9 MB/1.00 GB (In compliance) Tables: 0 Rows: 0/10000 (In compliance) - refreshing Fork/Follow: Unsupported Rollback: Unsupported Continuous Protection: Off Add together-on: postgresql-cubed-97628 This indicates I accept a hobby database (gratis), running Postgres 13.five, with no data.
The example app you lot deployed already has database functionality, which yous should be able to reach by visiting your app's URL and appending /db. For instance, if your app was deployed to https://wonderful-app-287.herokuapp.com/ then visit https://wonderful-app-287.herokuapp.com/db.
Notwithstanding, accessing it now will yield a relation "hello_greeting" does not exist error, considering while the database is configured, the tables have not yet been created.
To create the hello_greeting table, run the standard Django manage.py drift command:
$ heroku run python manage.py migrate Running python manage.py migrate on ⬢ serene-caverns-82714... upward, run.4231 (Costless) Arrangement check identified some issues: WARNINGS: hello.Greeting: (models.W042) Automobile-created main key used when non defining a main key blazon, past default 'django.db.models.AutoField'. HINT: Configure the DEFAULT_AUTO_FIELD setting or the AppConfig.default_auto_field attribute to point to a subclass of AutoField, eastward.g. 'django.db.models.BigAutoField'. Operations to perform: Apply all migrations: admin, auth, contenttypes, hullo, sessions Running migrations: Applying contenttypes.0001_initial... OK ... Now admission the /db route over again and you'll encounter a simple page update every fourth dimension yous access it:
Page View Report Jan. nineteen, 2022, 6:12 p.m. Jan. xix, 2022, 6:17 p.m. The code to access the database is straightforward, and makes use of a unproblematic Django model called Greetings that y'all tin find in how-do-you-do/models.py.
Whenever you visit the /db route of your app, the post-obit method in the hello/views.py file is invoked which creates a new Greeting and then renders all the existing Greetings:
def db(request): greeting = Greeting() greeting.salve() greetings = Greeting.objects.all() return return(request, 'db.html', {'greetings': greetings}) Assuming that yous have Postgres installed locally, use the heroku pg:psql command to connect to the remote database and see all the rows:
$ heroku pg:psql --> Connecting to postgresql-cubed-97628 psql (14.i, server 13.five (Ubuntu 13.5-2.pgdg20.04+1)) SSL connection (protocol: TLSv1.3, cipher: TLS_AES_256_GCM_SHA384, $.25: 256, compression: off) Type "help" for help. serene-caverns-82714::DATABASE=> Read more near Heroku PostgreSQL.
A similar technique tin can exist used to install MongoDB or Redis add together-ons.
Next steps
You lot at present know how to deploy an app, modify its configuration, view logs, calibration, and attach add-ons.
Here'south some recommended reading. The commencement, an commodity, will give y'all a firmer understanding of the basics. The second is a arrow to the master Python category here on Dev Centre:
- Read How Heroku Works for a technical overview of the concepts you'll run into while writing, configuring, deploying and running applications.
- Read Deploying Python and Django Apps on Heroku to understand how to take an existing Python or Django app and deploy it to Heroku.
- Visit the Python category to learn more about developing and deploying Python applications.
- Learn more than about the Heroku developer experience and CI/CD features in the Heroku Enterprise Developer Learning Journey.
Source: https://devcenter.heroku.com/articles/getting-started-with-python?singlepage=true
0 Response to "Uploading Your Python Application to Heroku and Use Bash"
Post a Comment